How to Start Seeds Indoors
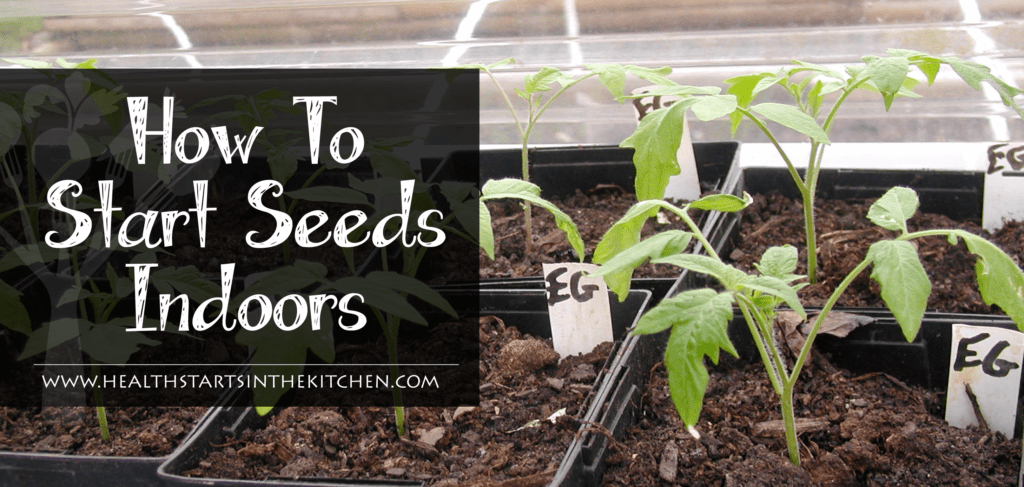
Starting plants from seed is a great, inexpensive way to get exactly the plant varieties you want to grow. Starting seeds indoors requires the same basic elements as growing plants outdoors: Light, Seeds, Soil, and Water.
Lighting
The hardest element to provide indoors is light. It is possible to start seeds in a room or on a windowsill that receives at least 8 hours of bright light. Some gardeners will need to supplement their seedling lighting with special plant or grow lights that simulate the full spectrum of the sun. Even then, the lights will need to be left on for 12 – 15 hours per day, for your seedlings to grow as strong and healthy as they would in sunlight.
Seeds
Another difficult aspect of starting seeds is deciding what seeds to grow. There are so many choices, it’s tempting to want to try them all. But keep in mind that as your seedlings grow, they will need to be moved into larger pots that will take up even more space. So choose wisely. Many of us start out own seeds so that we can ensure that they are Non-GMO and Organic. I only recommend purchasing seeds from companies that have taken the “Safe Seed Pledge” click HERE for the full list.
Potting Soil
We’re always cautioned to use a good potting soil, but what difference does it make, really? Well, potting soil very often has no soil at all in it. It’s a mix of peat, vermiculite and other fluffy matter that has the wonderful properties of being both water retentive and well-draining, because it doesn’t pack down like garden soil. It’s also free of diseases and insects that may be over-wintering in your garden soil. I prefer to use an organic seed starting mixture or peat pellets.
Containers & Trays
Seeds are particular about the container you choose to grow them in, nearly anything that will hold dirt will work. Don’t feel pressure to buy fancy seed starting kits, feel free to recycle plastic containers when you’re just starting out. I personally prefer to use peat pellets and/or peat pots that I can plant directly into the soil – pot and all!
When to Start Seeds
When to start your seeds is always a bit of a educated guess. First you’ll need to know when your last expected frost date is. Then check your seed packet to see how many weeks growth are required before setting outdoors. Count back that many weeks from your last expected frost date, to get an approximate date for starting those seeds. It’s approximate because weather does not always live up to predictions, but you’ll be in the ballpark. Different plants will require different timing, so use a calender to make down when to start what.
For a more detailed seed starting and garden planting timeline I recommend the Week by Week Vegetable Gardener’s Handbook.
How to Start Seeds
Planting the seeds is so easy and fun! Starting seeds indoors is no different than starting seeds outdoors. Maintaining seedling indoors will take a bit more diligence though, since you can’t rely on rain and sun to do the work for you, and your seedlings will be depending on you to get their lives off to a good start. But the effort is enjoyable, especially if you are snowbound or suffering from cabin fever like us!
- Dampen the seed starting mixture before you put it into your seed starting containers. It is easier to get a uniform level of moisture if you do it this way. Ideally the consistency should be similar to that of a rung-out sponge. It should be wet, but not dripping, with no dry lumps.
- Use the pre-dampened seed starting mixture to fill your seed starting containers
- Small seeds can be sprinkled on top of the seed starting mixture. Larger seeds can be counted out and planted individually. Use at 2-3 seeds per container, since not all seeds will germinate and not all that do germinate will survive. You can thin extras later.
- Lightly cover the seeds with more dampened seed starting mixture and then gently firm again.
- Although the potting mix was pre-dampened, it is still a good idea to sprinkle some additional water on top of the newly planted seed. This insures that the top layer of mix won’t dry out and it also helps to firm the seed starting mixture and insure good contact between the seed the mix.
- Your seeds are now ready to be covered loosely with some type of plastic. This will help hold in both heat and moisture. You can place the whole container into a plastic bag or simply lay a sheet of plastic over the container. If you have special seed starting trays with plastic covers, use those.
- Move your container to a warm, draft free spot and check it daily. Most seeds germinate best when the temperature is between 65 and 70 degrees F. The top of a refrigerator is an idea spot or you could consider purchasing heating mats specially made for germinating seed.
- Once your seedlings begin poking through the seed starting mixture, they will start to straighten up and two leaves will appear. At this point you should move your seedlings under a light source and remove the plastic covering.Be sure the seed starting mixture stays moist, but not wet .
- Your seedlings will need between 12-18 hours of light each day. This may seem extreme, but artificial light and even the low rays of the winter sun are not as intense as full summer sun. The best way to insure regular long doses of light is to attach your florescent or high intensity plant lights to an automatic timer.
- Seedlings can remain in their original containers until you are ready to plant them in their permanent spots. However it is common to move the seedlings into a larger pot once several sets of leaves have formed and the seedling is a couple of inches tall. This is called “potting up” and it allows the roots more room to develop. Three to four inch pots are good sizes to pot up to, allowing plenty of room for root growth.
- If more than one seedling is growing in the same pot, either separate the seedlings into individual pots or cut off all but the strongest seedling. Don’t try to pull out the extra seedlings, since this might hurt the roots of the seedling you are keeping.
- Once it’s warm enough to plant outdoors, and your soil is ready to be worked, it’s time to start hardening off. This process acclimates your pampered seedlings to the more harsh conditions out in your garden, and is essential for making sure that all of that work you put into starting plants from seed doesn’t go to waste.

