Stuffed Cabbage Rolls for a Crowd (70 Rolls in an Electric Roaster)
When you’re making stuffed cabbage rolls for a crowd, you might as well make enough for everyone! This old-fashioned stuffed cabbage recipe makes up to 70 generously sized cabbage rolls filled with seasoned ground beef, rice, Parmesan cheese, onions, garlic, and fresh parsley, all cooked in a rich tomato sauce with bacon.
Every fall, the weekend before we close up our camper at the lake for the winter, we gather with our lake friends for what we affectionately call our “Last Supper.” It’s our way of celebrating another wonderful summer together before everyone packs up and heads home for the season.
And apparently, I’ve made it my personal responsibility to make sure nobody leaves hungry!
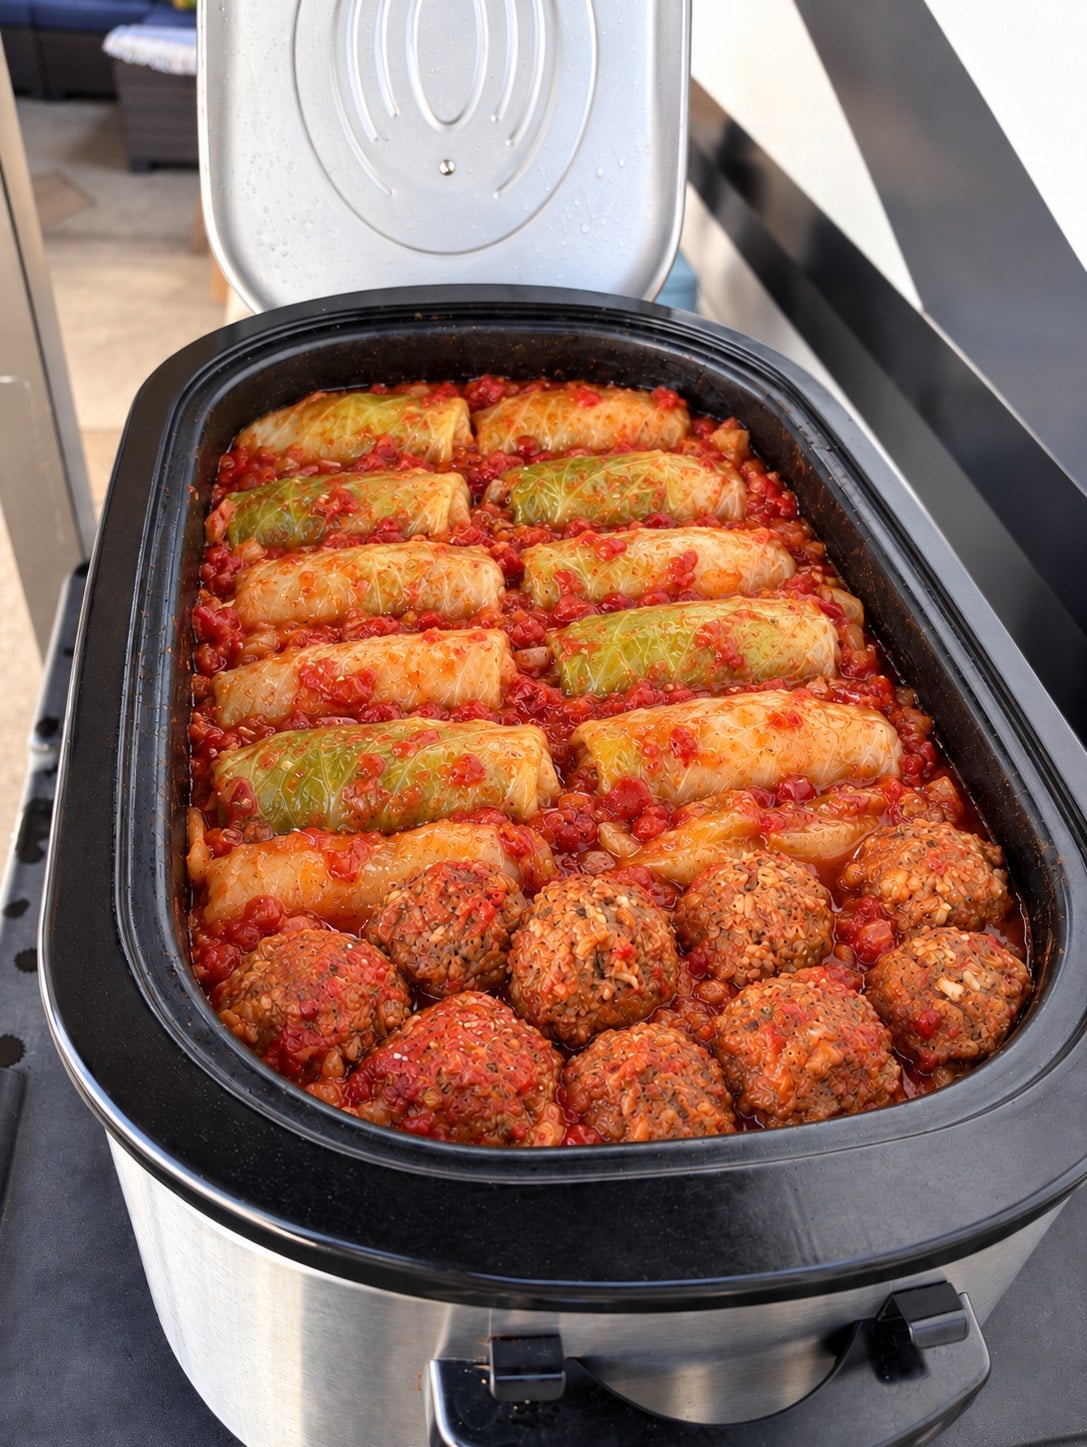
I typically make 55 stuffed cabbage rolls and 15 porcupine meatballs, all cooked together in my 22-quart electric roaster. This recipe easily feeds 20+ people, with plenty of leftovers for everyone to take home.
It’s a lot of food, but I’ve figured out how to spread the preparation over a few days so I can spend more time enjoying our final weekend at the lake instead of working in the kitchen.
Making Stuffed Cabbage Rolls for a Crowd
Stuffed cabbage, sometimes called halupki or golabki, is one of those old-fashioned comfort foods that takes a little work but is absolutely worth the effort. Both Ray’s and my grandmothers made stuffed cabbage, so it’s a recipe with plenty of family history for us.
When I’m making a small batch, I have my Low-Carb Stuffed Cabbage Rolls with Tomato Sauce recipe that I’ve been sharing for years. But when I’m feeding our entire lake crew, I pull out my giant electric roaster and make this traditional version with rice.
There’s something about a huge roaster full of tender cabbage rolls, homemade tomato sauce, and savory beef filling that makes everyone happy. And while this is definitely a big recipe, it’s really just a matter of organizing the preparation so it doesn’t become overwhelming.
The most important things I’ve learned are to season the meat filling generously, use every bit of the cabbage, and give yourself plenty of time.
How Many Stuffed Cabbage Rolls Does This Recipe Make?
This recipe makes up to 70 stuffed cabbage rolls, depending on the size of your cabbage leaves and how generously you fill them.
I usually make approximately 55 stuffed cabbage rolls and 15 porcupine meatballs instead.
Why the meatballs? Because whenever you’re feeding a large group, there are inevitably a few people who love the meat and rice filling but aren’t particularly fond of cabbage.
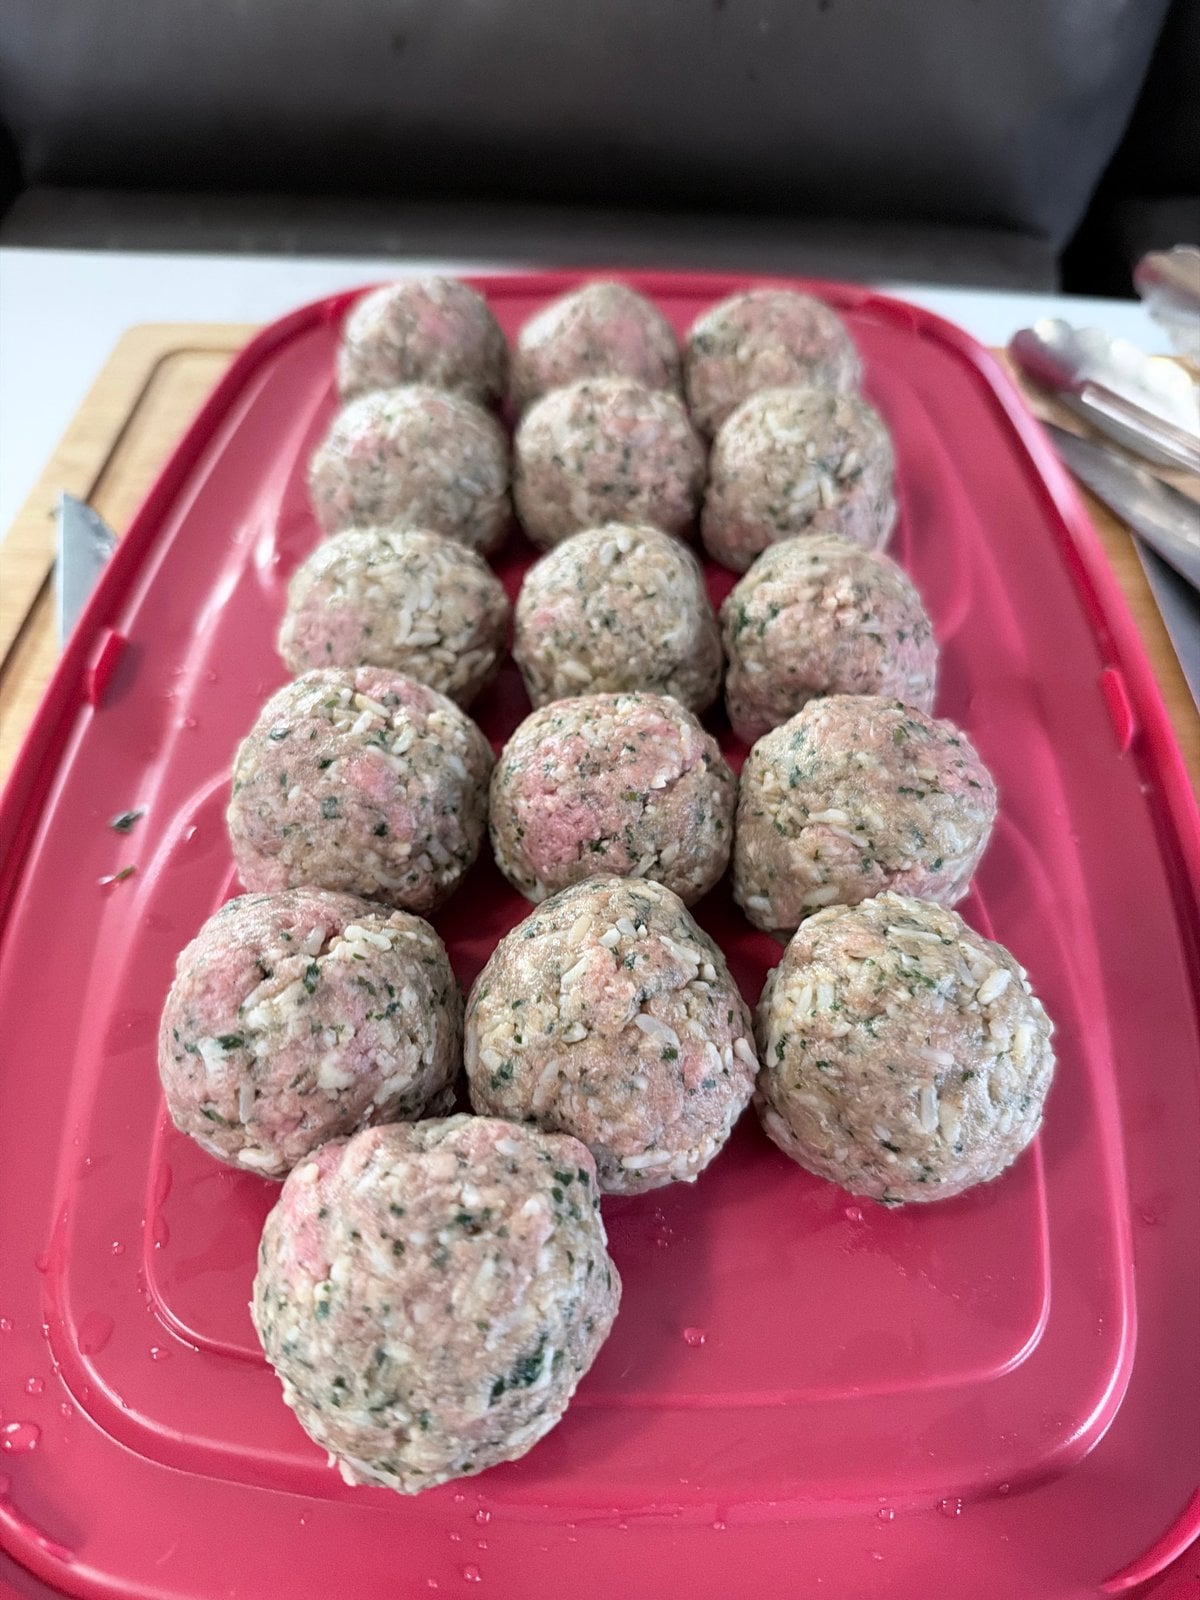
Porcupine meatballs are simply the same seasoned beef and rice mixture formed into meatballs instead of being wrapped in cabbage leaves. They cook right alongside the stuffed cabbage in the tomato sauce, so there’s no need to prepare a separate meal.
The meatballs are always a hit, and I love that everyone gets to enjoy dinner regardless of how they feel about cabbage!
The Equipment I Use for Making 70 Stuffed Cabbage Rolls
You don’t need a commercial kitchen to make this recipe, but having a few oversized pieces of equipment makes a big difference.
22-Quart Electric Roaster
If you need a roaster, this 22-quart Oster electric roaster is an example of the size to look for. Check the capacity and instructions for your own model before filling it.
My most important piece of equipment is my 22-quart countertop electric roaster. It’s large enough to accommodate multiple layers of stuffed cabbage rolls, the porcupine meatballs, and all that delicious tomato sauce.
I generally end up with about three layers of stuffed cabbage, with the extra cabbage and bacon lining the bottom of the roaster.
This frees up my oven and makes serving a large crowd much easier.
Large Rubbermaid Food Storage Containers
For mixing the filling and storing the cabbage rolls before cooking, I use two Rubbermaid EasyStore 2.59-gallon (9.8-liter) containers with SecureGrip lids.
They’re large enough to work with a huge batch of ingredients, and I can neatly arrange the cabbage rolls inside without smashing them together.
Once everything is rolled, I divide the cabbage rolls, porcupine meatballs, and chopped cabbage centers between the two containers, cover them, and refrigerate until cooking day.
Because the filling contains raw beef, it’s important to keep everything cold throughout preparation and storage.
A Large Stockpot and Food Processor
You’ll also need a large stockpot for blanching the cabbage heads and a food processor for finely chopping the onions, garlic, and fresh parsley.
You can certainly chop everything by hand, but when you’re making this much food, the food processor saves a tremendous amount of time.
Don’t Forget a Roaster Liner!
One little shortcut I highly recommend is using a disposable liner specifically designed for your electric roaster.
After hours of cooking tomatoes, cabbage, and bacon, the roaster can be quite a mess. A liner makes cleanup so much easier, especially when you’re preparing food for a party.
Choose a liner that fits a 22-quart roaster and is rated for at least 350°F. PanSaver clear electric roaster liners are one option for moist casserole-style cooking at up to 350°F. Follow the manufacturer’s preheating and water instructions carefully; the water goes in the removable insert, not the electrical base. Never exceed the liner’s temperature rating.
How to Prepare Cabbage Leaves for Stuffing
Preparing the cabbage leaves is probably the most time-consuming part of making stuffed cabbage, but once you get started, it becomes pretty routine.
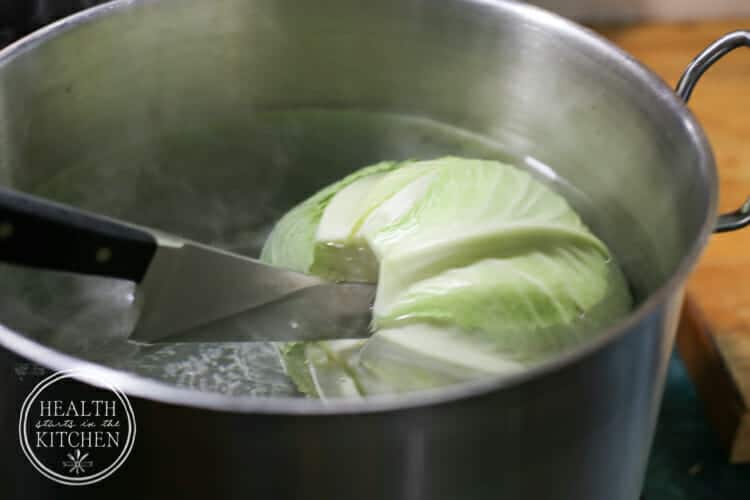
I start with four large heads of green cabbage, removing any brown, damaged, or discolored outer leaves. Using a sharp knife, I cut around the base of each cabbage core to help loosen the leaves.
One trick I’ve learned is to stab a sturdy carving fork or serving fork directly into the cabbage core. It gives you a convenient handle for holding and maneuvering the cabbage while blanching it in boiling water.
Working with one head at a time, I lower the cabbage into a large pot of boiling water. As the outer leaves soften, I carefully peel them away and set them aside to cool.
The goal is to have approximately 70 usable leaves, although the exact number depends on how large your cabbage heads are.
Let the leaves cool before adding the chilled meat filling.
You want the leaves soft and flexible enough to roll without tearing. They don’t need to be completely cooked because they’ll finish cooking in the roaster.
Don’t Throw Away the Cabbage Centers!
Once you’ve removed all the large leaves suitable for stuffing, you’ll have the smaller, tightly packed cabbage centers left over.
Don’t throw those away!
I quarter the remaining cabbage centers, remove the tough cores, and thinly slice the cabbage. These pieces are used to create a thick layer in the bottom of the roaster.
I aim for approximately two inches of cabbage underneath the stuffed cabbage rolls. This adds flavor to the finished dish and helps keep the rolls from sitting directly against the bottom of the roasting pan.
And honestly, those tender pieces of cabbage cooked with bacon and tomato sauce are delicious all on their own.
My Secret to Delicious Stuffed Cabbage Filling
If there’s one thing I want you to remember when making this recipe, it’s this:
Always cook a small sample of your meat filling before tasting it!
I start by finely chopping the onions, garlic, and fresh parsley in my food processor. You want everything chopped very finely, but not liquefied.
I use about 3½ family-size bags of Success Boil-in-Bag White Rice from the 32-ounce box containing six family-size bags. Cook the rice according to the package directions first, divide it into shallow containers, and refrigerate promptly. Chill it before mixing with the raw beef.
Then I combine the vegetable mixture with the ground beef, rice, eggs, Parmesan cheese, and seasonings. With 7½ pounds of ground beef, I find it easiest to mix everything together with my hands.
Once everything is thoroughly combined, I pinch off a small portion of the filling, shape it into a little meatball, and fry it in a skillet until a food thermometer reads at least 160°F in the center. Never taste the raw filling.
Then I taste it.
If it needs more Jane’s Krazy Mixed-Up Salt or black pepper, I add it to the entire batch, mix again, and sometimes cook another small test meatball.
Don’t be afraid to season generously! With this much beef and rice, it’s easy to end up with a bland filling if you’re too conservative with the seasoning.
Taking a few extra minutes to taste and adjust the filling makes a tremendous difference in the finished stuffed cabbage.
How to Roll Stuffed Cabbage
Once the cabbage leaves are cooled and the meat filling is seasoned perfectly, it’s time to start rolling.
Lay a cabbage leaf flat on your work surface. If the center vein is thick or tough, carefully shave it down with a sharp knife. This makes the leaf much easier to roll without tearing.
Place a portion of the meat filling near the base of the cabbage leaf, fold the sides inward, and roll it snugly around the filling, much like wrapping a burrito.
You want the filling securely wrapped, but not so tightly that the cabbage tears.
Continue until you’ve made approximately 55 stuffed cabbage rolls, or as many as you prefer. Any remaining filling can be shaped into porcupine meatballs.
The photos below show the trimming and folding technique from my low-carb recipe; the filling pictured is that version.
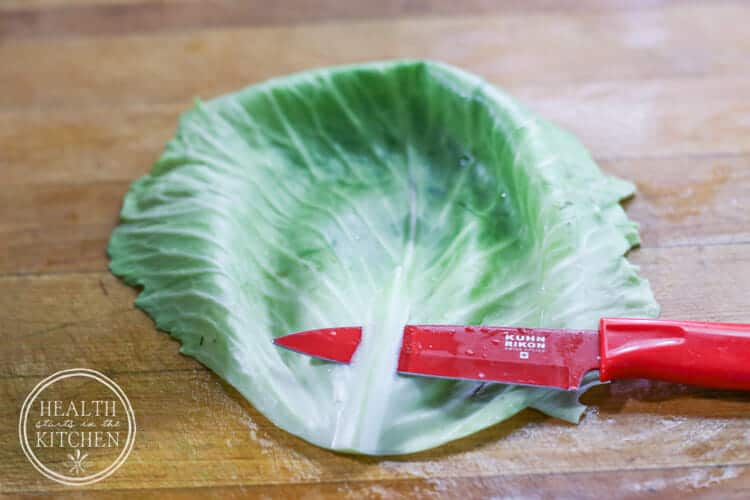
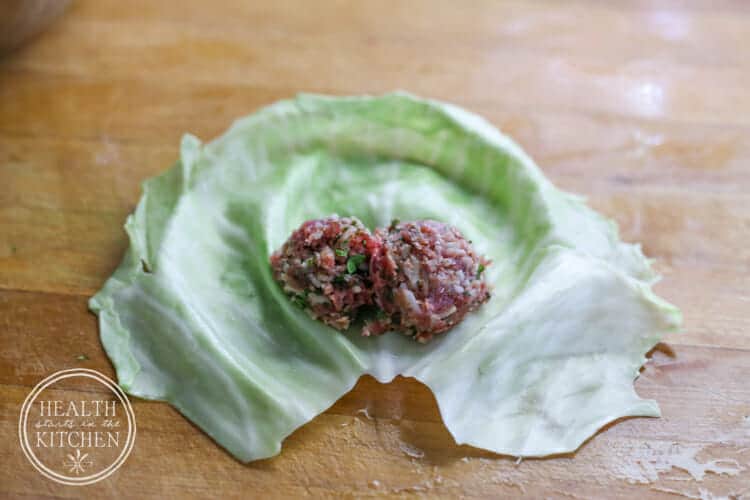

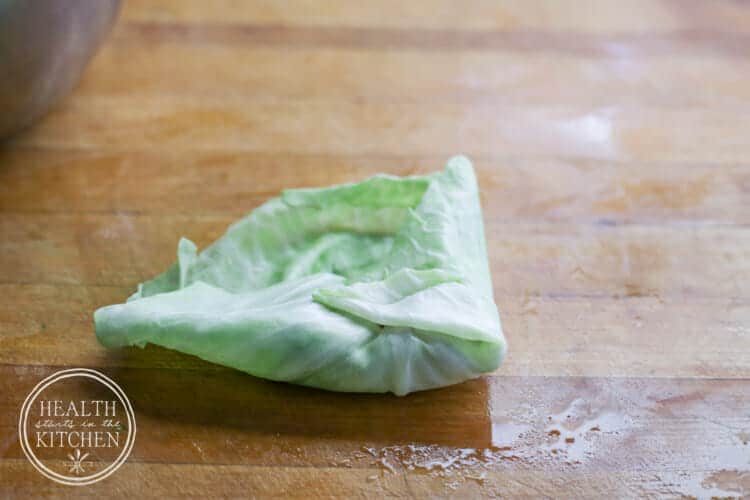
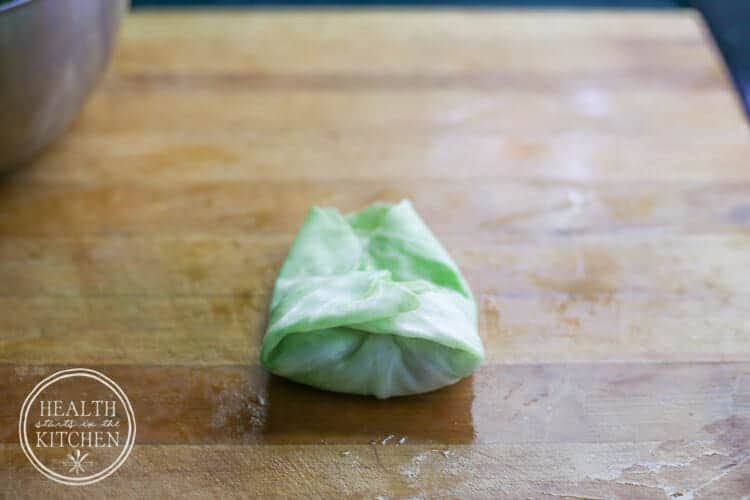
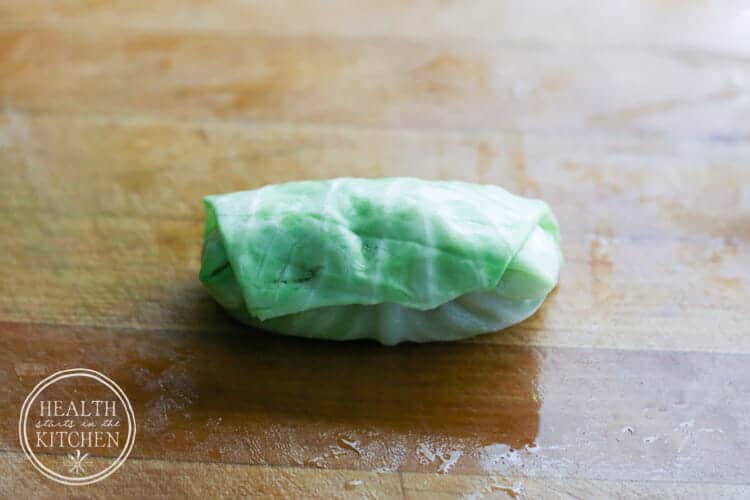
If you’re new to rolling stuffed cabbage, my original stuffed cabbage recipe includes step-by-step photos showing exactly how I trim and fold the leaves.
My Three-Day Make-Ahead Stuffed Cabbage Schedule
When I’m making this giant batch for our annual Last Supper, I spread the work over three days.
It’s so much easier than trying to do everything at once, and it means I’m not spending our entire last weekend at the lake working in the kitchen.
Day 1: Prepare the Meat Filling in the Evening
I buy fresh ground beef on Day 1 and keep it cold. That evening, I prepare and season the ground beef and rice filling, then cook the rolls on Day 3. Keep the entire purchase-to-cooking window within 1–2 days, with the beef and filling refrigerated at 40°F or colder.
I chop the onions, garlic, and parsley in the food processor, combine everything with the beef, rice, eggs, Parmesan, and seasonings, and cook a small test meatball to make sure it tastes exactly how I want it.
Once the filling is ready, I divide it into covered containers and refrigerate it overnight. I keep the meat well chilled throughout preparation and make sure the containers aren’t packed so deeply that the mixture can’t chill quickly.
Day 2: Roll the Stuffed Cabbage in the Morning
The next morning, I blanch the cabbage heads, prepare the leaves, and roll all the stuffed cabbage.
Any remaining meat filling gets shaped into porcupine meatballs.
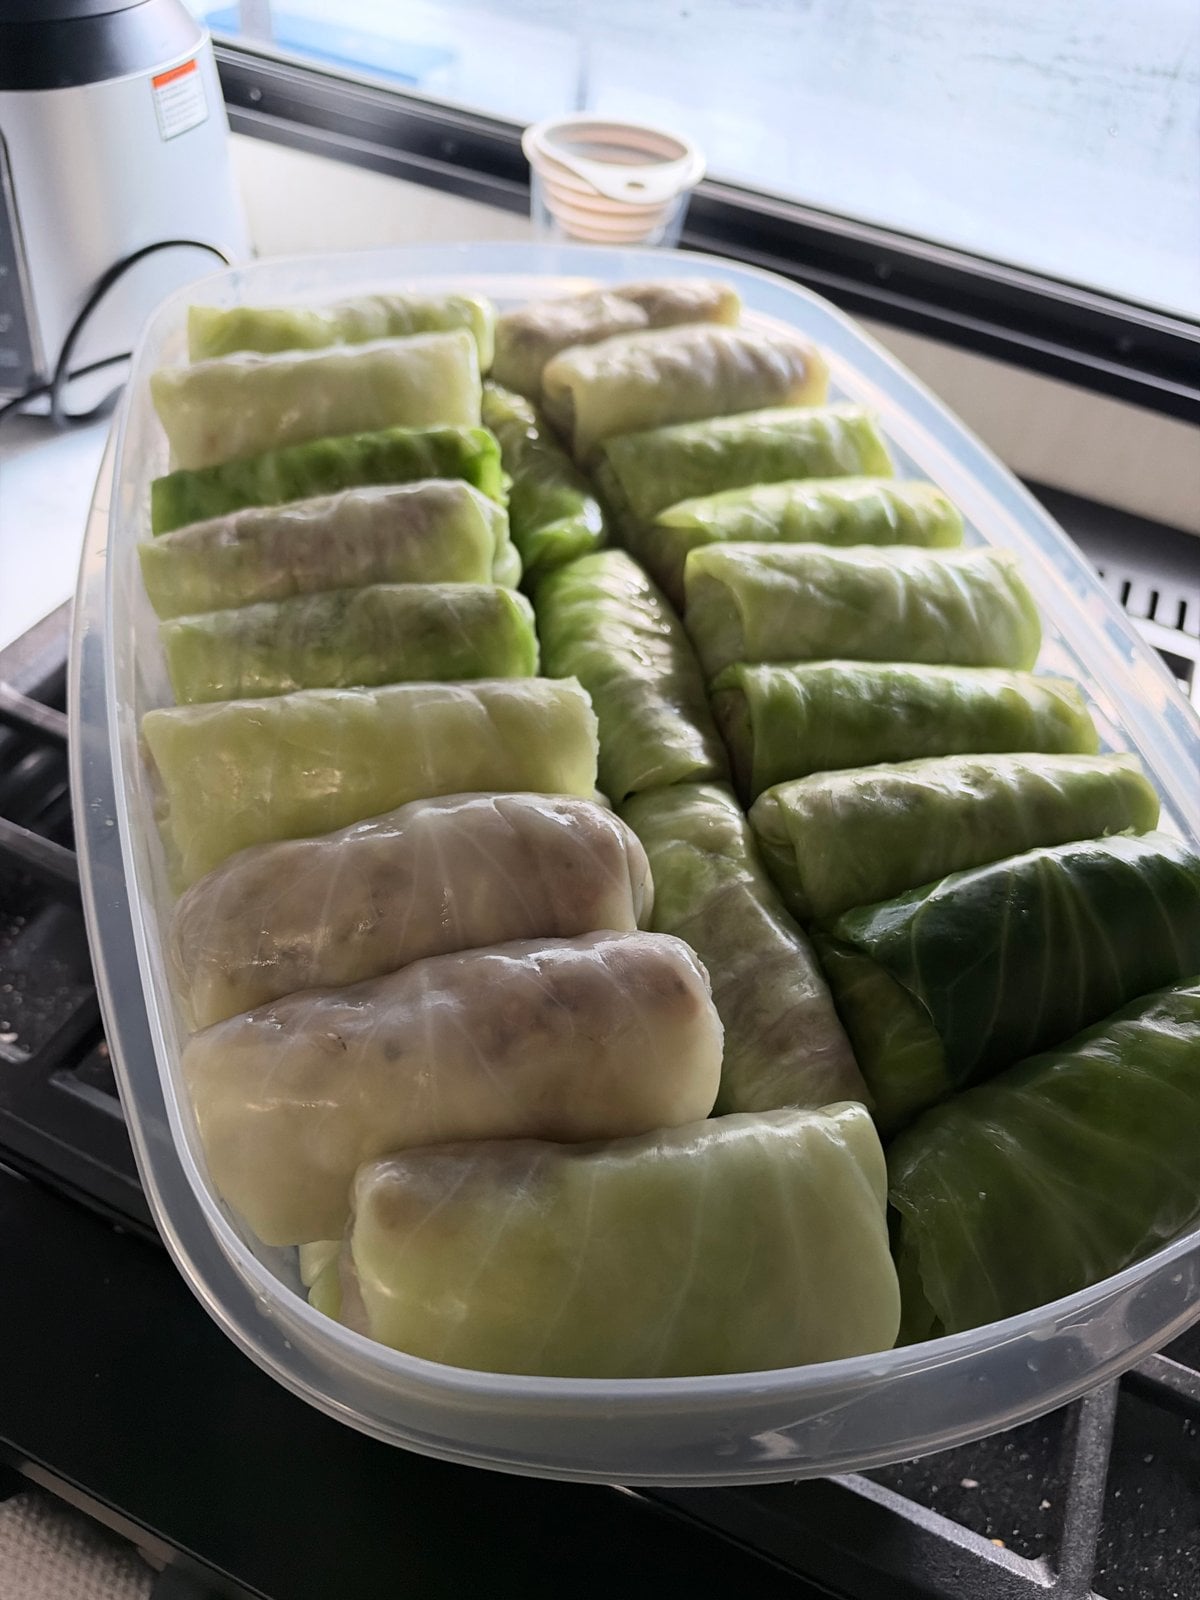
As I finish rolling, I arrange the stuffed cabbage neatly into my large Rubbermaid storage containers, along with the meatballs and chopped cabbage centers.
Everything gets covered and refrigerated until cooking day.
At this point, all the messy preparation is finished, the kitchen is cleaned up, and I’m ready for the easy part!
Day 3: Assemble the Roaster and Cook All Day
On the morning of our Last Supper, I get my 22-quart electric roaster ready and start layering everything together.
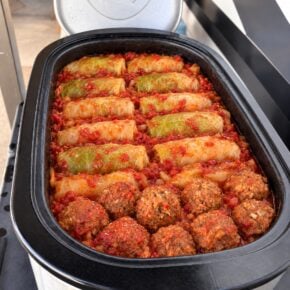
First comes the thick layer of sliced cabbage and chopped bacon, followed by the stuffed cabbage rolls, whole peeled tomatoes, and seasonings.
I typically end up with about three layers of cabbage rolls. The porcupine meatballs get tucked in wherever there’s room.
Finally, I add the tomato juice and condensed tomato soup, cover the roaster, and let everything cook throughout the day.
By dinnertime, the cabbage is wonderfully tender, the meat filling is flavorful, and the tomato sauce has absorbed all the delicious flavors.
A note about food safety: Raw ground beef should be cooked or frozen within 1–2 days of purchase or thawing. Plan your three-day preparation schedule so the meat stays within that window, and keep the filling and assembled rolls refrigerated at 40°F or below. If you need to prepare further ahead, freeze the assembled rolls instead.
How Long Does Stuffed Cabbage Take in an Electric Roaster?
For this large batch, I typically cook the stuffed cabbage in my covered 22-quart electric roaster at 350°F for approximately 8 hours.
Yep, eight hours!
With so many cabbage rolls layered together, I like giving everything plenty of time to become tender and develop that wonderful slow-cooked flavor.
Cooking times can vary depending on your particular roaster, how tightly the cabbage rolls are packed, and how cold everything is when you start.
Use a food thermometer to check several cabbage rolls, including those in the very center of the roaster, and make sure the filling reaches 165°F. The cabbage should be tender enough to cut easily with a fork.
Can You Cook Stuffed Cabbage Overnight?
When I’m preparing stuffed cabbage for a lunchtime party instead of dinner, an overnight schedule can be convenient.
However, with a batch this large, it’s important not to start with a cold roaster full of raw ground beef and leave it at a low temperature overnight.
If using an overnight method, first cook the cabbage rolls fully, checking that the centers reach 165°F. Then, if your electric roaster supports safe hot holding, you can reduce the temperature and keep the cooked cabbage rolls at or above 140°F until serving.
A 200°F roaster setting may maintain a safe holding temperature, but verify the actual temperature of the food rather than relying on the dial. Follow the manufacturer’s instructions and monitor the temperature.
When I can, I prefer the all-day cooking method because it’s easier to supervise.
How to Make a Thicker Tomato Sauce
My standard recipe uses one gallon of whole peeled tomatoes, one quart of tomato juice, and one 23.2-ounce can of Campbell’s Condensed Tomato Soup.
This creates plenty of flavorful tomato juices around the stuffed cabbage rolls, which is especially nice when serving a large group.
However, if you prefer a thicker, richer tomato sauce, there’s an easy variation.
For thicker tomato sauce:
- Use two 23.2-ounce cans of condensed tomato soup instead of one.
- Omit the 1 quart of tomato juice.
- Keep the gallon of whole peeled tomatoes, including their juices.
This makes a heartier sauce that coats the stuffed cabbage rolls and porcupine meatballs more generously.
Either way is delicious, so it really comes down to personal preference.
Don’t Forget to Taste the Sauce Before Serving!
Once the rolls and meatballs are fully cooked and checked with a food thermometer, I taste the tomato juices in the roaster and adjust the seasoning if necessary.
Even though I generously season the beef filling and each layer of cabbage, the flavor of the sauce can change as everything cooks together.
Sometimes it needs another sprinkle of Jane’s Krazy Salt or a little more black pepper.
This final seasoning adjustment is just as important as tasting the meat filling before rolling. Don’t skip it!
Looking for a Smaller, Low-Carb Stuffed Cabbage Recipe?
While this giant party-size recipe uses traditional rice, I also have a delicious Low-Carb Stuffed Cabbage Rolls with Tomato Sauce recipe that I shared years ago.
That recipe uses cauliflower rice instead of traditional rice and makes a much smaller batch. I’ve also included directions for preparing it in the oven, slow cooker, or pressure cooker.
Both versions have their place in my kitchen. When I’m feeding a small group or want a grain-free option, the original recipe is perfect. When I’m feeding our entire lake crew, this big-batch version is the one I make.

A Last Supper Tradition Worth Keeping
Our annual Last Supper isn’t anything fancy. It’s a giant roaster full of stuffed cabbage, a group of friends we’ve spent the summer with, and everyone heading home with a container of leftovers.
After months of camping, enjoying the lake, and making memories together, it’s our way of celebrating another season before we close everything up for the winter.
I started writing down this recipe because I wanted to document exactly how I make it, from the giant batch of meat filling to the three-day preparation schedule and all the little tricks I’ve learned along the way.
Some recipes are worth saving simply because of the memories that come with them.
And this is definitely one of those recipes.
Party-Size Stuffed Cabbage Rolls in an Electric Roaster
Equipment
- Large stockpot for blanching cabbage
- Food Processor
- Large Mixing Bowl
- Sharp knife
- Sturdy carving fork or serving fork
- Large skillet for testing meat seasoning
- Food thermometer
Ingredients
- 4 large heads green cabbage
- 7 1/2 pounds ground beef
- 3 1/2 family-size bags Success Boil-in-Bag White Rice from the 32-ounce box containing 6 family-size bags; cook according to package directions, then chill
- 8 large eggs
- 1 cup grated Parmesan cheese
- 4 medium yellow onions
- 8 cloves garlic
- 2 cups finely chopped fresh parsley
- 1/2 cup Jane’s Krazy Mixed-Up Salt divided
- 1/4 cup ground black pepper divided
- 1 gallon whole peeled tomatoes including juices
- 1 quart tomato juice
- 1 23.2-ounce can Campbell's Condensed Tomato Soup undiluted
- 1/2 pound bacon cooked and chopped
- Additional salt and pepper to taste, if needed

Instructions
- Prepare the cabbage. Remove any brown or discolored outer leaves from the cabbage heads. Using a sharp knife, cut around the base of each core to loosen the leaves. Insert a sturdy carving fork or serving fork into the core to help maneuver the cabbage while blanching. Working with one cabbage head at a time, blanch in a large pot of boiling water, gently removing the leaves as they soften and become flexible. Set aside to cool. Aim for approximately 70 usable leaves.
- Prepare the cabbage centers. Quarter the remaining cabbage centers and remove the tough cores. Thinly slice the remaining cabbage and set aside for lining the bottom of the roaster.
- Prepare the vegetables and rice. Prepare the boil-in-bag rice according to package directions. Divide it into shallow containers and refrigerate promptly; chill before mixing with the raw beef. Do not leave the rice on the counter to cool for hours. Add the onions, garlic, and fresh parsley to a food processor. Pulse until very finely chopped, but not liquefied.
- Mix the meat filling. In an extra-large mixing bowl or food-safe container, combine the ground beef, prepared rice, eggs, Parmesan cheese, and finely chopped onion mixture. Add approximately half of the Jane’s Krazy Salt and half of the black pepper, reserving the remaining seasoning for adjusting the filling and seasoning the cabbage layers. Mix thoroughly with clean hands until everything is evenly combined.
- Taste and adjust the seasoning. Remove a small portion of the filling and form it into a meatball or patty. Fry it in a skillet until a food thermometer reads at least 160°F in the center. Never taste the raw filling. Taste and adjust the seasoning in the remaining filling as needed. Repeat the test if necessary. This is one of the most important steps! The filling needs to be generously seasoned before rolling.
- Roll the stuffed cabbage. Lay a softened cabbage leaf flat and carefully shave down any thick center veins with a sharp knife. Place a portion of meat filling near the base of the leaf. Fold in the sides and roll snugly around the filling. Repeat until you’ve made approximately 55 stuffed cabbage rolls. Shape the remaining filling into approximately 15 porcupine meatballs, or continue rolling for up to 70 stuffed cabbage rolls.
- Prepare the electric roaster. If using a disposable roaster liner, insert it according to the manufacturer’s instructions. Spread the reserved chopped cabbage centers across the bottom of the roaster in a layer approximately 2 inches deep. Sprinkle the cooked, chopped bacon over the cabbage and season lightly with Jane’s Krazy Salt and black pepper.
- Layer the stuffed cabbage rolls. Arrange the stuffed cabbage rolls snugly over the cabbage and bacon, seam-side down. Add approximately one-third of the whole peeled tomatoes, breaking them apart with your hands as you distribute them. Season lightly with the reserved salt and pepper. Continue layering the cabbage rolls and tomatoes, seasoning each layer as you go. You’ll typically have approximately three layers. Nestle the porcupine meatballs into the roaster wherever space allows.
- Add the tomato sauce. Pour the tomato juice and condensed tomato soup evenly over the stuffed cabbage rolls. Cover the electric roaster.
- Cook until tender. Set the 22-quart electric roaster to 350°F and cook for approximately 8 hours, or until the cabbage is very tender and the filling reaches 165°F throughout. Check the internal temperature of several cabbage rolls, particularly those in the center of the roaster. Cooking time will vary depending on the roaster and how tightly everything is packed. Add a little additional tomato juice or water if needed to maintain adequate moisture.
- Taste the sauce and adjust the seasoning. Once the rolls and meatballs are fully cooked and checked with a food thermometer, taste the tomato juices in the roaster. Add additional Jane’s Krazy Salt or black pepper as needed.
- Serve and enjoy! Serve the stuffed cabbage rolls and porcupine meatballs with plenty of tomato sauce and tender cooked cabbage from the bottom of the roaster.